41st Bomb Group Gallery
"B-25 Mitchell Bomber Group"
|
41st Bomb Group Gallery"B-25 Mitchell Bomber Group" |
|
41st Photo 1 - 41st Photo's
Page 1
41st Photo 2 - 41st Photo's Page 2
41st Photo 3 - 41st Photo's Page 3
41st Photo 4 - 41st Photo's Page 4
41st Bomb Group
|
47th Bomb Squadron Gallery"The Crow Flight Squadron" |
|
47th Photo 1 - 47th Photo's
Page 1
47th Photo 2 - 47th Photo's Page 2
47th Photo 3 - 47th Photo's Page 3
47th Bomb Squadron
|
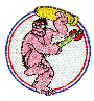
48th Bomb Squadron Gallery"Lefty's Wolf Pack Squadron" |
|
48th Photo 1 - 48th Photo's Page
1
48th Photo 2 - 48th Photo's Page
2
48th Bomb Squadron
|
396th Bomb Squadron Gallery"The 396th Squadron" |
|
396th Photo 1 - 396th Photo's Page 1
396th Photo 2 - 396th Photo's Page 2
396th Bomb Squadron
|
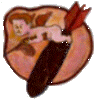
820th Bomb Squadron Gallery"The Alley Oop Squadron" |
|
820th Photo 1 - 820th Photo's Page 1
820th Photo 2 - 820th Photo's Page 2
820th Bomb Squadron
Back to the starting place:
41st Bomb Group